
Building a React Native pipeline for Android and iOS
I’m familiar with React and Azure Pipelines but not with React Native and, I haven’t touched mobile development since 2018. What better way to upskill on these items than by building a pipeline targeting both iOS and Android?
Approach and Result
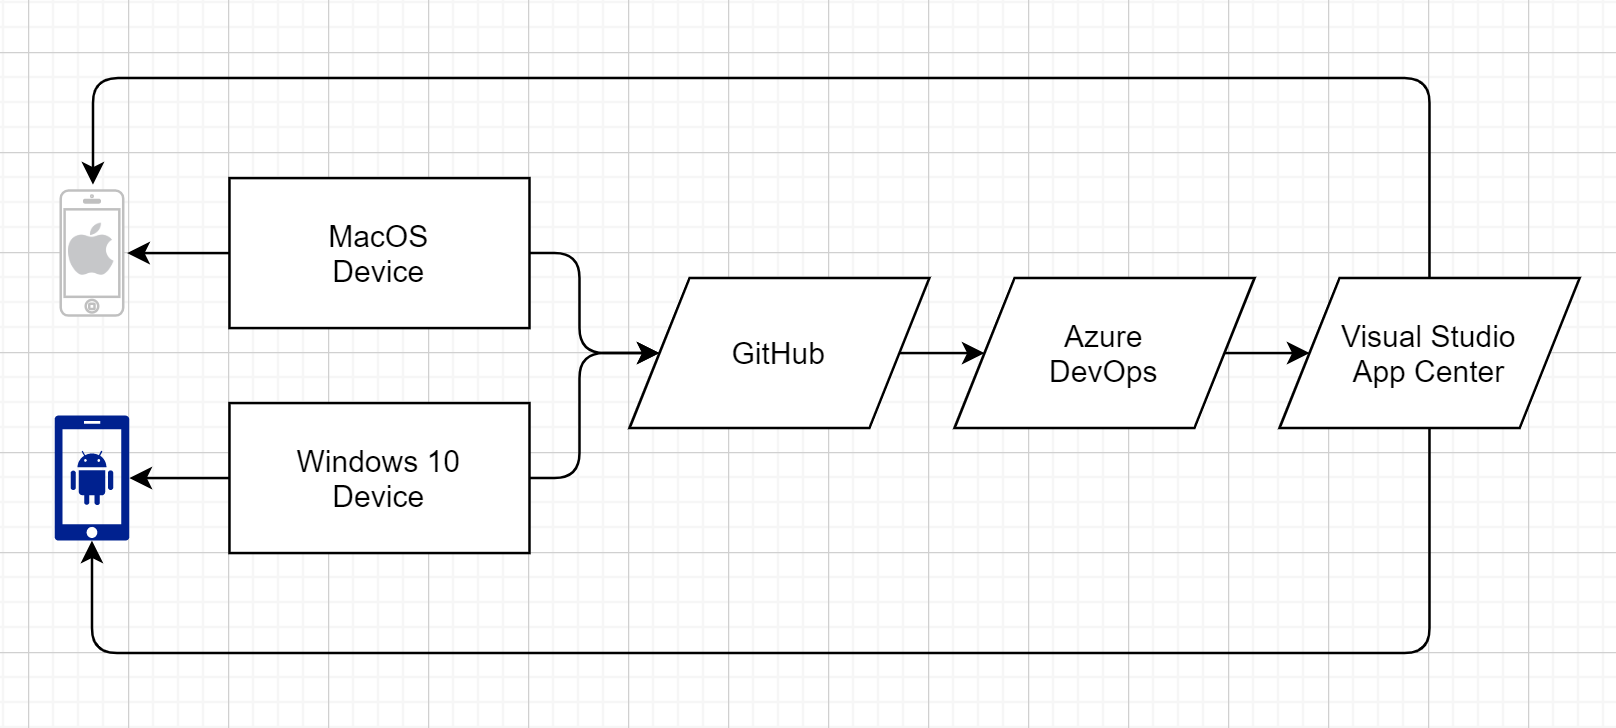
I’ll build on both MacOS and Windows 10 so I get that true multi-platform vibe. I’ll want run on both emulators and locally connected hardware and, pipelines for both Android and iOS that will trigger from commits to a git master branch. I’ll use Azure Pipelines to build and publish app packages, and I’ll also forward these packages to Visual Studio App Center so I can send builds out to testers. Here’s a look at that architecture.
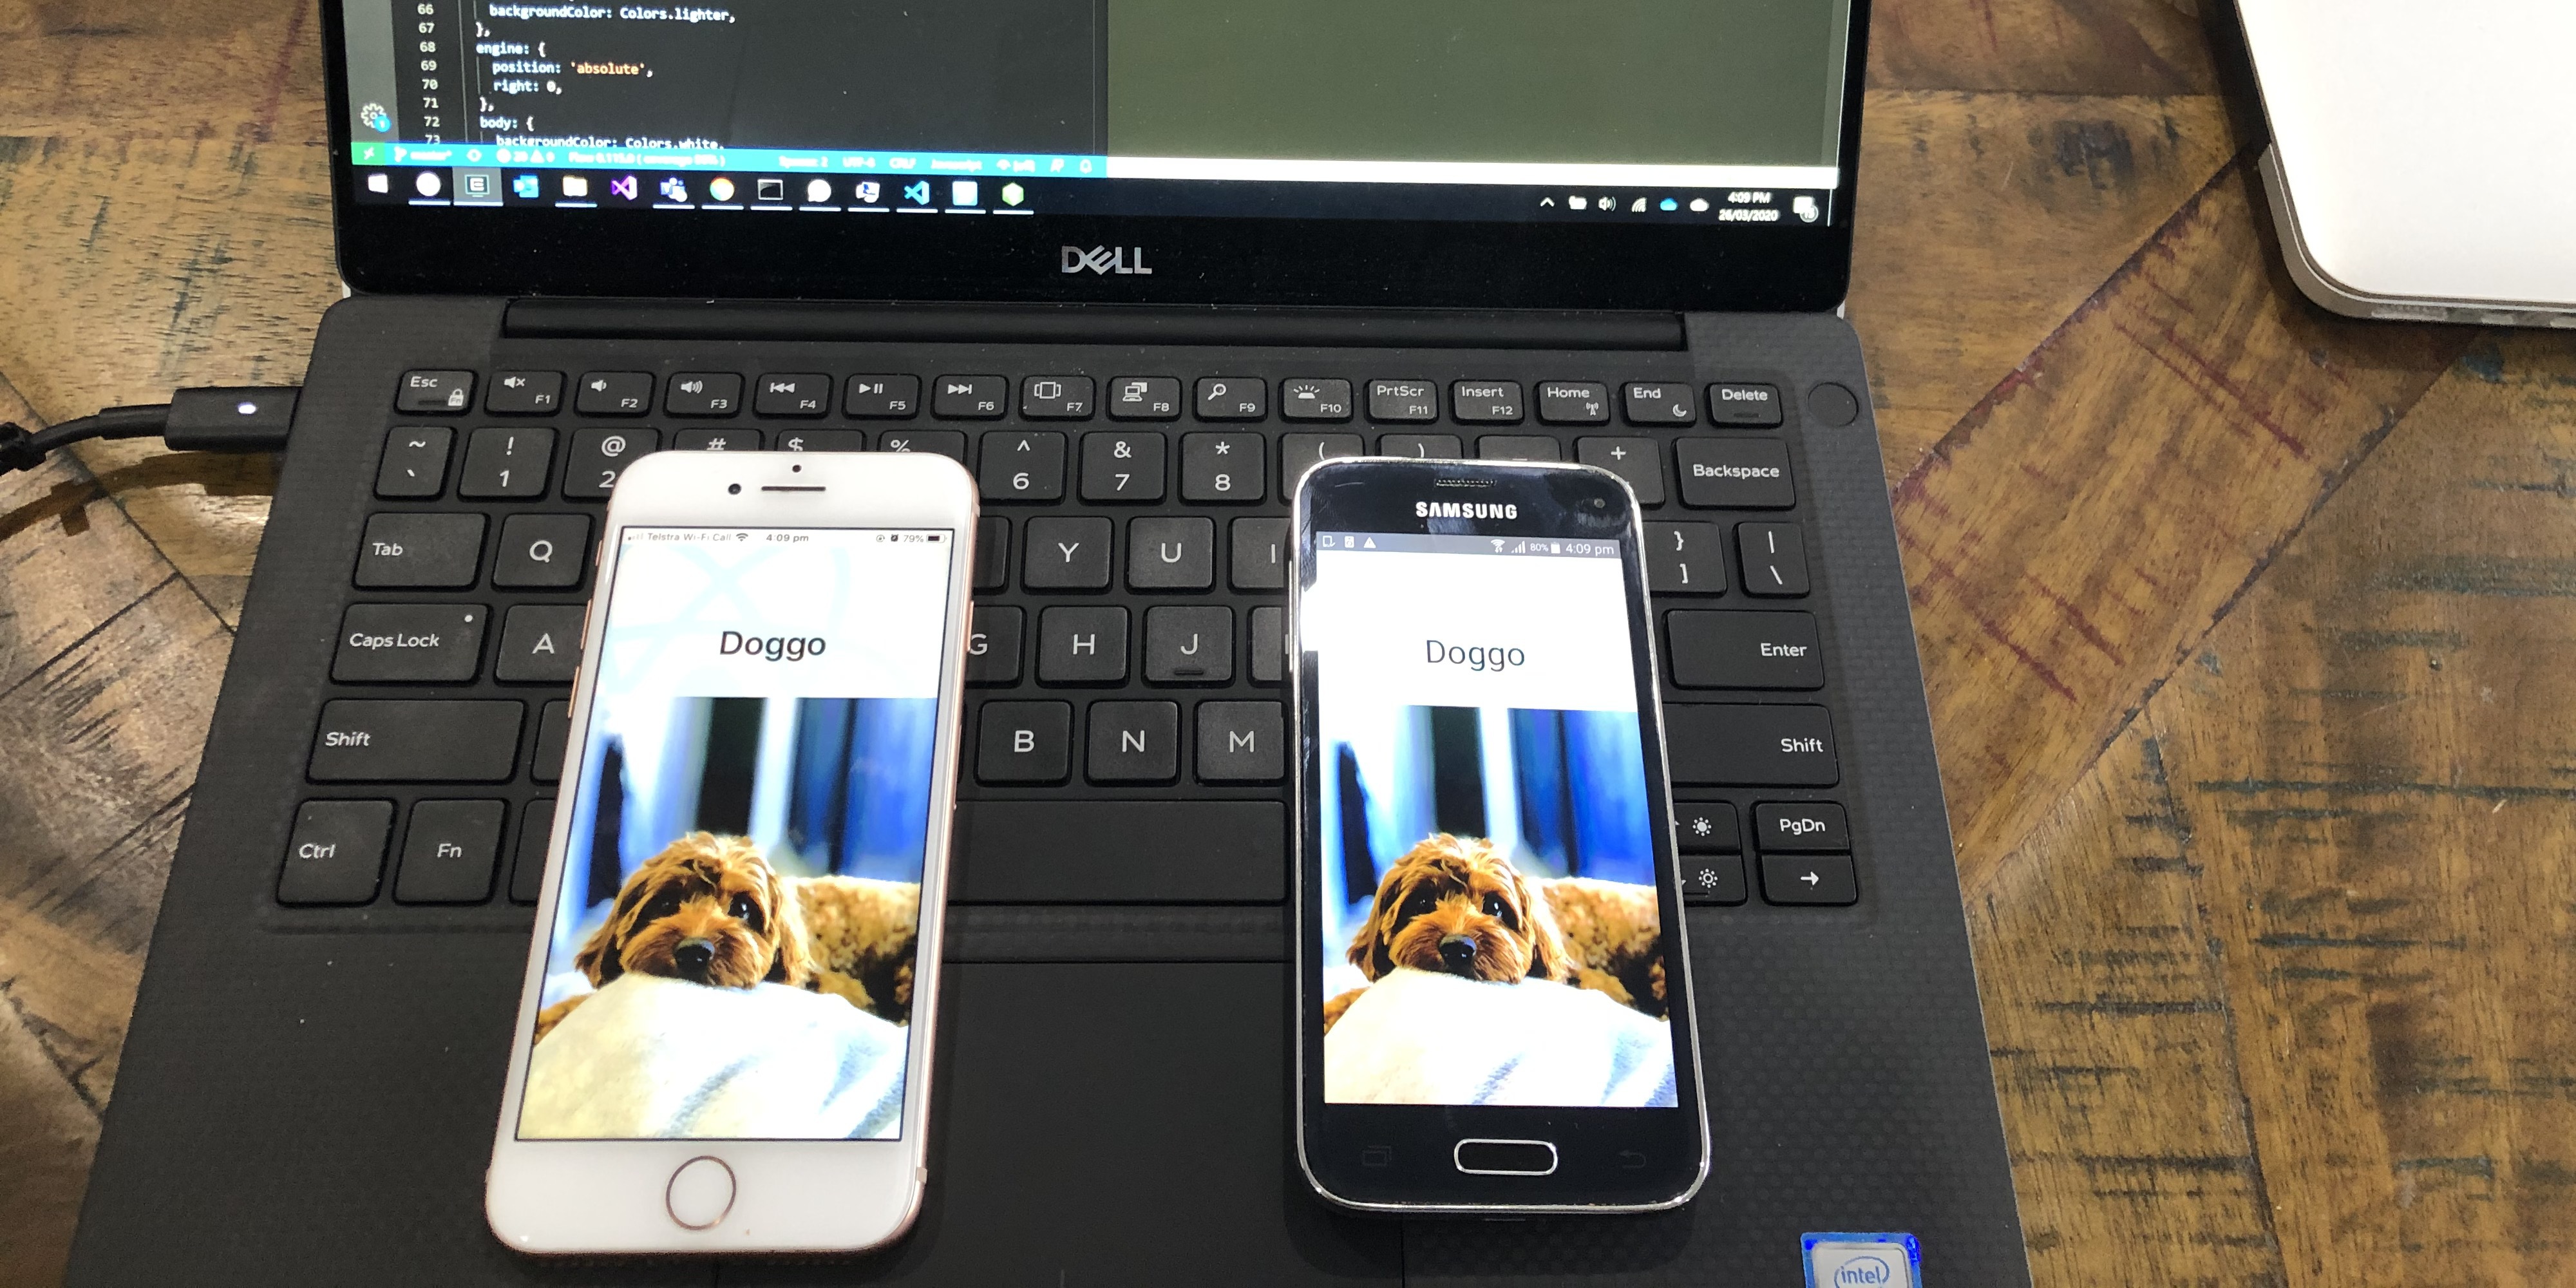
The result is a React Native application that I can edit, develop and test on either MacOS or Windows, then commit to source and minutes later receive install links from App Center. The source is available here and you can see the pipelines in action here.
React Native
 I decided to start with the MacOS/iOS route first and the guide on reactnative.dev is very straight forward. Rather than install node via homebrew I prefer to use (and already had installed) nvm and this worked without issue. Installing XCode was a whole lot of waiting, but once it was ready I could
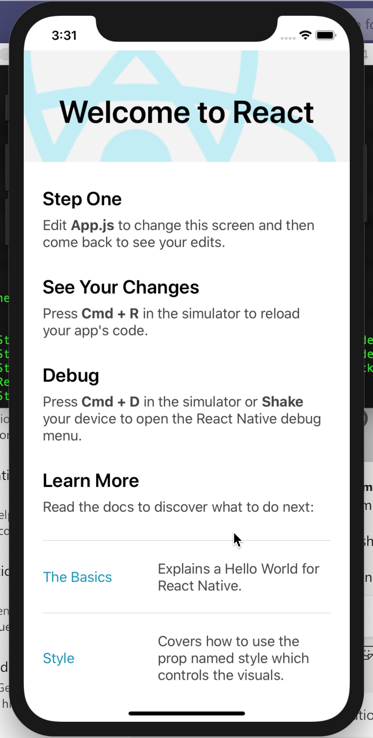
 npx react-native init AwesomeProject and I was on my way. Too quickly for that last bit as afterwards I realised I could have specified --template react-native-template-typescript - because I did not, the project defaulted to using flow. Regardless, at this stage I could npx react-native run-ios and the app was up and running on the simulator.
One issue I identified on MacOS was that the metro bundler failed to start because I already had another application listening on port 8081, so I moved that application to a different port. I had the same issue on Windows but there was no error, so when it didn’t work initially I had to remember the 8081 fix I used on MacOS.
Code signing
To get the app running on mobile devices and app stores, they’ll need to be signed, and here’s a great video describing what’s involved. Letting XCode create certificates and provisioning profiles seemed like the easier option for me, especially since I can’t add profiles and devices myself via developer.apple.com because I’m using my company’s enterprise account. When XCode generates your provisioning profile, it will drop a .mobileprovision into ~/Library/MobileDevice/Provisioning Profiles and add a certificate to Keychain. You export the certificate as .p12 by selecting both the certificate and the private key in Keychain and using right-click > Export 2 items.

I had at first intended App Center to perform the builds, however after uploading the .mobileprovision and the .p12, App Center could not sign the build and failed with;
Oh no, we couldn’t configure your branch!
Provisioning profile “iOS Team Provisioning Profile: com.staffordwilliams.ReactNativePipeline” does not include the provided signing certificate.
In an attempt to solve this I deleted my .mobileprovision and certificate and had Xcode regenerate them - to no effect. I got help from App Center through their integrated live support function (which turned out to be quite responsive), however even after proving the certificate was definitely in the profile, we could not get App Center to accept it. Instead I completed the build in Azure Pipelines and forwarded details for the App Center team to investigate further.
Azure Pipeline
 A colleague gave me his
 .yaml for a native iOS pipeline and I tweaked this to support react-native, the result of which you can see here. The changes included;
- Installing Node
- Installing Node depdenencies
- Uploading
.mobileprovisionand.p12to secure files - Using the task mentioned in the video above to set the version on the bundle
- Configuring an api key in App Center and adding a Service Connetion in Azure DevOps for it
- Updating any paths/names to be specific to my app
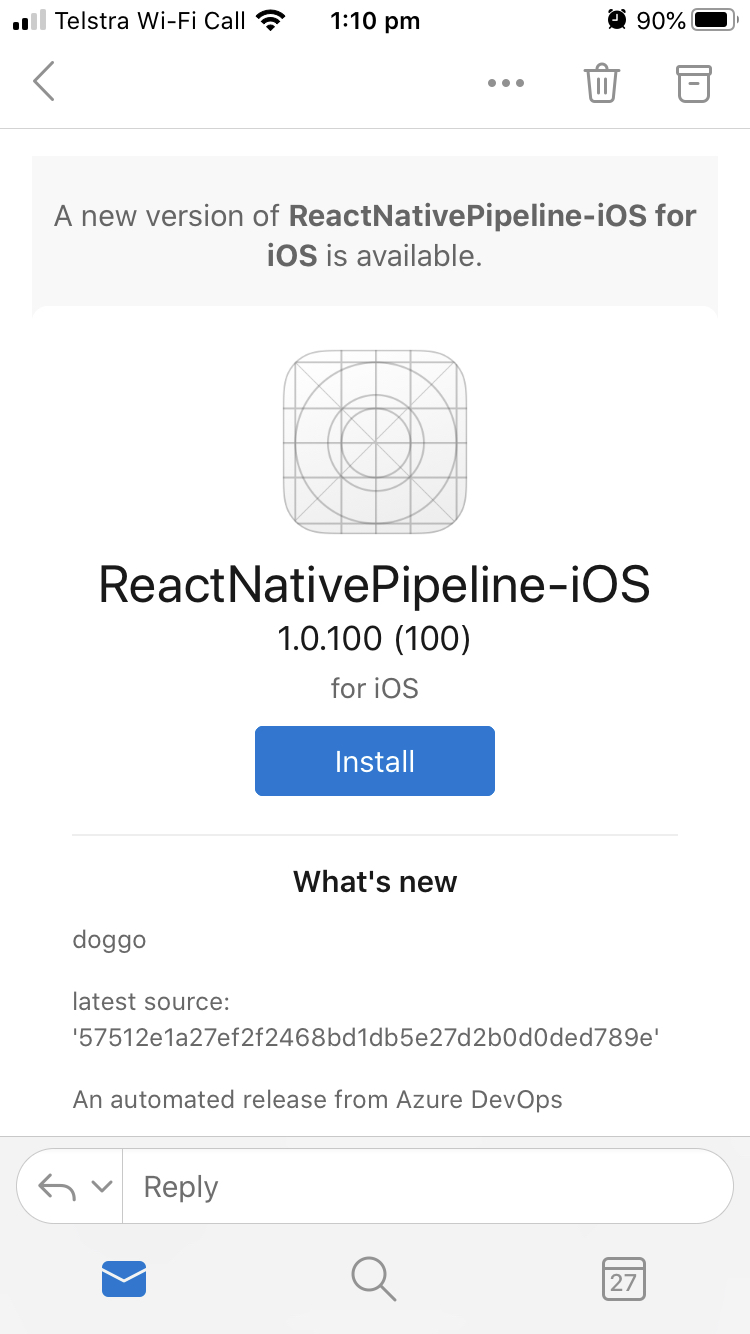
Once this was green I got an email on my iOS device with a link to install the app. Build time from commit time to receiving the email is about 10 minutes.
Android
After the iOS pipeline was up I moved to my Windows 10 device, installed Android Studio and other dependencies, and found an old Samsung S5 Mini lying around my house. I had complained about how long it took to install Xcode, and while Android Studio was a quicker install, the tweaks and dependencies took at least what felt like longer.
Hyper-V and HAXM
These two don’t mix, so while the react-native docs suggested I needed to install HAXM, I definitely did not need to do that (and could not, because I use Hyper-V, mostly for docker). If Hyper-V is enabled, HAXM install will fail with;
This computer does not support Intel Virtualization Technology (VT-x) or it is being exclusively used by Hyper-V. HAXM cannot be installed. Please ensure Hyper-V is disabled in Windows Features, or refer to the Intel HAXM documentation for more information.
In the past, a work-around for this was to use the Android Emulator for Visual Stuiod, however, that is no longer the case, and I ignored the big orange text at the top of that page, and lost an hour or so. The latest Android Emulator works fine without HAXM and with Hyper-V, which this article explains (I find) poorly.
Anyhow, I thought react-native docs could explain this better so I opened a PR.
SDK versions and Gradle
 Android Studio will install the latest SDK and an Android Virtual Device (AVD) for it, however, React Native doesn’t support latest and you’ll need to install the older versions via the SDK manager. Because I’m “efficient”, I uninstalled the latest SDK while doing this, breaking the AVD that it also installed. I’m also very impatient, and saw no configurations ready to run the project in Android Studio. After banging my head around for a bit the solution turned out to be;
- Wait for the Gradle background task in Android Studio to complete (approx 6 minutes)
- Add another AVD supporting using the prior API
After this I could run the emulator and the project and up popped my app, and yes, now it’s the multi-platform, pipeline-built-and-distributed implementation of this tweet. Pushing to a local device was all of stopping the emulator and starting the app with a device connected and visible to Android Debug Bridge (adb), which meant plugging it in via USB.
Android pipeline
I was able to find an example online and used this for my base - the author has a great write-up also. The completed result is here and I learnt some further lessons when it didn’t initially work.
- task: NodeTool@0
  displayName: 'Install Node'
  inputs:
    versionSpec: '12.16.1'
The above step ensures npm is available, however, I thought the versionSpec to be redundant and that leaving it out would install latest. This is not the case, and instead the agent will check if any version is available and will not install one even if an older one is present. This resulted in two issues, first the gradle task was throwing the following error and failing;
:ReactNative:Unexpected empty result of running ‘[node, -e, console.log(require(‘react-native/cli’).bin);]’ command.
Additionally there was a node-gyp error, but this was not immediately apparent as it did not cause the npm task to fail;
SOLINK_MODULE(target) Release/.node
clang: warning: libstdc++ is deprecated; move to libc++ with a minimum deployment target of OS X 10.9 [-Wdeprecated]
ld: library not found for -lstdc++
clang: error: linker command failed with exit code 1 (use -v to see invocation)
make: *** [Release/.node] Error 1
gyp ERR! build error
gyp ERR! stack Error: `make` failed with exit code: 2
gyp ERR! stack at ChildProcess.onExit (/Users/runner/hostedtoolcache/node/6.17.1/x64/lib/node_modules/npm/node_modules/node-gyp/lib/build.js:276:23)
gyp ERR! stack at emitTwo (events.js:106:13)
gyp ERR! stack at ChildProcess.emit (events.js:191:7)
gyp ERR! stack at Process.ChildProcess._handle.onexit (internal/child_process.js:219:12)
gyp ERR! System Darwin 18.7.0
gyp ERR! command "/Users/runner/hostedtoolcache/node/6.17.1/x64/bin/node" "/Users/runner/hostedtoolcache/node/6.17.1/x64/lib/node_modules/npm/node_modules/node-gyp/bin/node-gyp.js" "rebuild"
gyp ERR! cwd /Users/runner/runners/2.165.2/work/1/s/src/node_modules/fsevents
gyp ERR! node -v v6.17.1
gyp ERR! node-gyp -v v3.4.0
gyp ERR! not ok
I burnt some time attempting to fix this by switching to yarn and pinning @react-native-community/cli to include this fix, however neither of those were the solution and ensuring versionSpec: '12.16.1' was present solved it.
There were a couple of gotchas on tasks also;
- For
AndroidSigning@3, some blogs mention committing the file specified byapksignerKeystoreFileto source, however, this should instead be uploaded to Azure DevOps as a Secure File. - For
Gradle@2, the parametergradleWrapperFileneeds to include theworkingDirectoryPatheven ifworkingDirectoryPathis specified.
Conclusion
I thought it would take me a couple of days to get this pipeline from nothing to up and running, but amongst other distractions it took three. With what I know about react-native and the Android and iOS Azure Pipeline tasks it’s not super complex, there’s just a number of parts and so integration takes time, especially if you haven’t done it (or bits of it) before. Azure Pipelines is otherwise a pretty stable tool to rely on, and react-native seems to just work. App Center is almost magical - it’s a shame I had the initial issues with being unable to sign a build, but, once configured, having an Android or iOS install link automatically emailed and seconds later the app installed does feel like magic.
Here are those links one last time;