
An Introduction to Stable Diffusion
Stable Diffusion is a latent text-to-image diffusion model capable of generating photo-realistic images given any text input. It’s similar to tools like DALL-E 2 and Midjourney except it’s open source and deterministic. This post will elaborate on the features offered by Stable Diffusion and provide guidance for running it on cloud provider GPU hosts.

Open source
Stable Diffusion v1 was publically released August 2022 and the v2.1 model was released in December 2022. The two models differ but both are open source, which has resulted in rapid community-driven improvement. Models that have been trained by end-users are shared across community sites like Civitai and Hugging Face. To train or generate images from the models python scripts are executed at a CLI level, however these too are open source and have resulted in the rise of several GUIs. The most popular GUI at the time of writing is colloquially called Automatic1111 after its author. Other popular GUIs include Vlad’s (a popular Automatic1111 fork), InvokeAI, ComfyUI and Easy Diffusion.

Deterministic
Unlike other AIs Stable Diffusion is deterministic. This means that if the same prompt and configuration values (also known as a workflow) are used then the same image is produced. Additionally, tools like Automatic1111 can embed the workflow data into the resulting image, allowing easy sharing. Image hosts like Civitai and r/StableDiffusion - Workflow Included contain both images generated and the workflow and configuration values needed to create them. This results in an excellent learning medium as users can identify images or styles they like, copy the configuration data into Stable Diffusion to produce the same image, and then tweak the configuration themselves to get variation or alternative style.
Requirements
You can run Stable Diffusion on your own machine by installing one of the GUIs. For the best, timely results, a GPU (preferably NVIDIA) is required. I was able to run it on my laptop which has a GTX 1650 4GB, but it was taking 60s+ to generate a single image. The more powerful your GPU, the quicker you’ll generate images and the more images you’ll be able to generate at any one time. An RTX 4090 probably has the best performance currently but has a price tag starting at $2,700. A more cost efficient approach is to use managed or unmanaged versions of the software on cloud hosts.

Cloud Providers
You can try out Stable Diffusion for free in various places including the Stable Diffusion Playground, however while these results can sometimes be impressive, they pale in comparison to the quality we’ll be able to achieve by running Stable Difussion on GPU hosts. If you’re just browsing and want a lot of hand-holding, RunDiffusion is a fully managed product that has preloaded models. It has speed and resolution limitations, and costs $0.50-2.50/hour depending on session size you go for. If you want full control over the entire stack, GPU hosts like runpod.io and vast.ai let you choose from docker images, or supply your own, and have RTX 4090s for as low as $0.40/hour. There’s a good comparison of the above here, but, to start I recommend chucking $5 on runpod due to their no bandwidth costs and cleaner UI.

Running on Docker
After deploying runpod’s RunPod Stable Diffusion v1.5+v2 template on a community cloud RTX 4090 ($0.59/hour), the pod will startup in a few seconds if it’s already cached or a few minutes if it needs to download. When the pod is ready, both Stable Diffusion on port 3000 and a Juypter Lab instance on port 8888 will be available. Ultimately we’ll be using the Juypter Lab a lot, but for now hit the Connect button on the pod and connect via port 3000 which will open a proxied route to the Automatic1111 GUI instance running on the pod. You should see something like the image below:
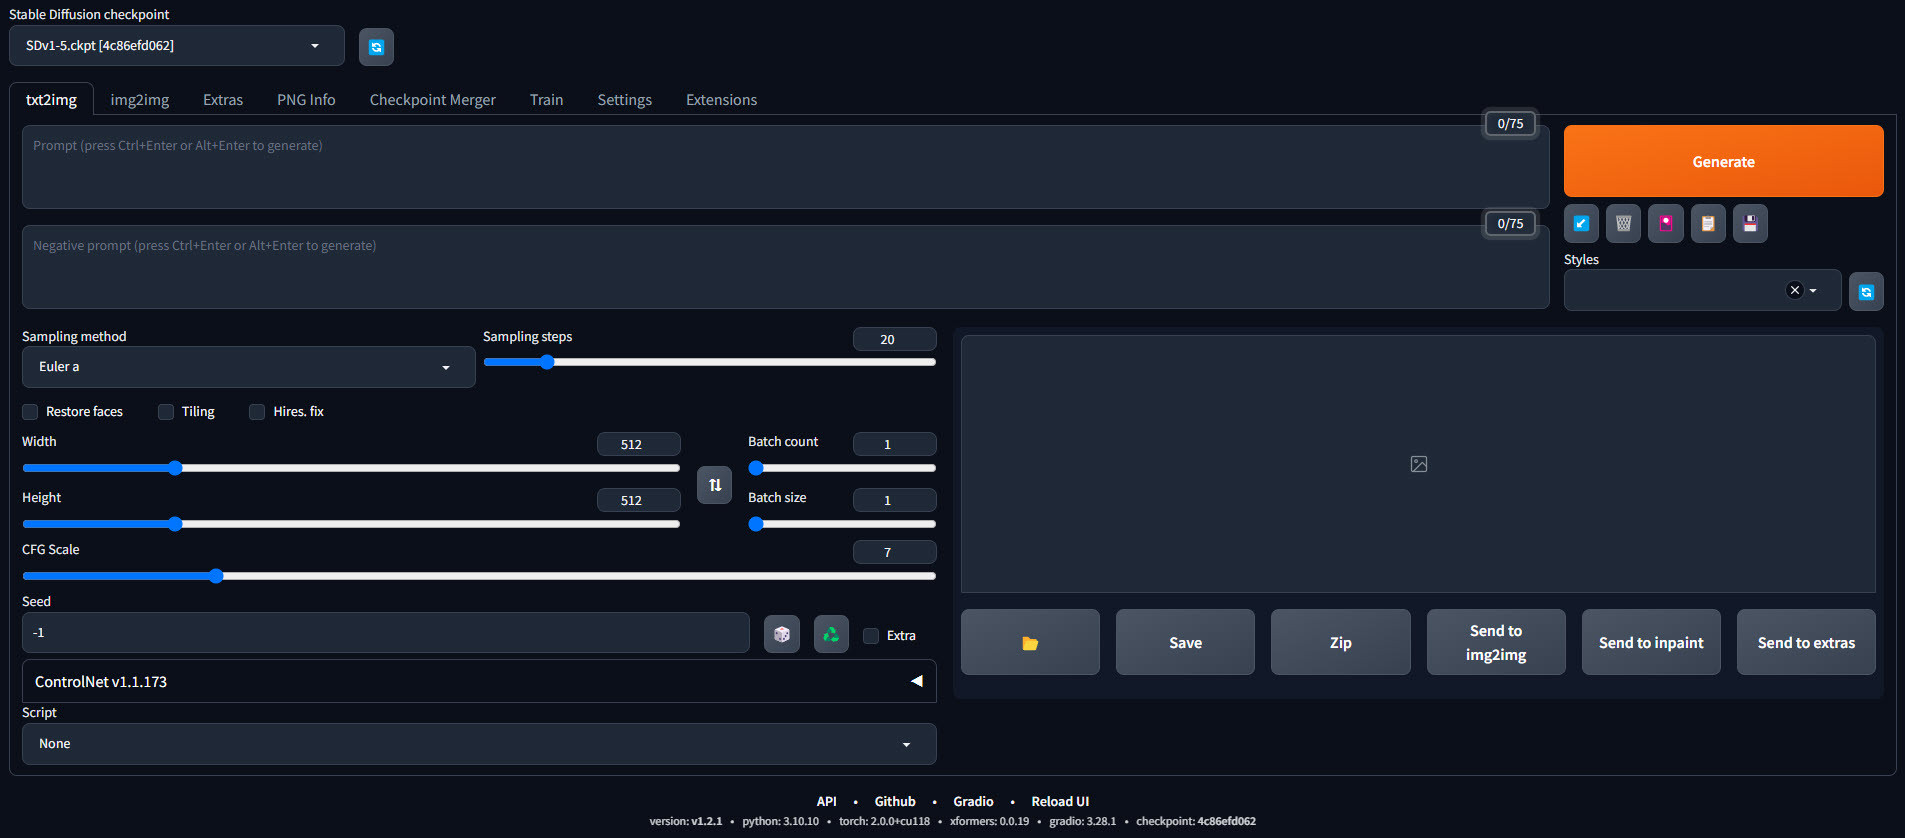
Type something in the first prompt box and hit generate. The first generation might take a few seconds but subsequent generations should take ~1-2 seconds. Increase the Batch Size to 6 and you’ll be using all 24GB of the 4090’s VRAM to generate six images at a time.
Conclusion
If you got this far, congrats on getting started with Stable Diffusion, but this is only the very beginning. The quality of images you’re able to generate can be vastly improved via proper prompting, using community trained models and extensions, and subsequent processing on initial generations with features like img2img, inpainting and upscaling. Training and fine-tuning models yourself including textual inversions, hypernetworks, LoRAs and DreamBooth push what is possible with Stable Diffusion even further in a direction of your choosing.
Stay tuned for further posts on Stable Diffusion or check out these Stable Diffusion links for more ideas and resources.